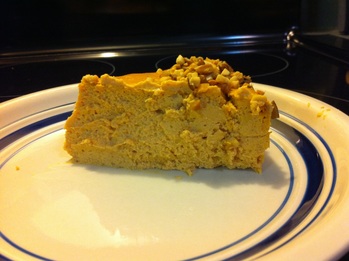
Weight Watcher Friendly - Crustless Pumpkin Cheesecake
Ingredients:
Non-Stick cooking spray
3 (8 oz) bars Neufchatel cream cheese, warmed in microwave 15 seconds
1/3 cup Splenda® Brown Sugar Blend
3 large eggs
1 (15 oz) can pumpkin
1/2 cup low-fat maple or vanilla yogurt
2 tbsp flour
1-1/2 tsp ground cinnamon
1 tsp ground ginger
1 tsp imitation maple or rum flavoring
1 tsp vanilla extract
Directions:
1. Preheat oven to 350 F. Coat the bottom and sides of a 9-inch spring form pan with non-stick cooking spray. Using an electric mixer, beat cream cheese and brown sugar blend together until smooth. Beat in eggs one at a time. Blend in pumpkin, yogurt, flour, cinnamon, ground ginger, maple flavoring and vanilla extract. Pour filling into prepared pan. Bake until outer rim is puffy and center is slightly wobbly, about 1 hour and 10 minutes. To keep from cracking the cheesecake, turn oven off after allotted time, and allow oven to cool completely before removing from the oven. Remove from oven and run a butter knife around the inner edge but do not remove the pan side. Let stand at room temperature 30 minutes. Refrigerate warm cake, uncovered until cold. Then cover with foil and refrigerate at least 4 hours (or up to 3 days). Remove 1 hour before serving. When ready to serve, carefully remove side of pan. Cut into 12 wedges with wet knife wiped clean between cuts. Garnish with fat free whipped topping if desired.
Yield: 12 equal size servings.
WW PointsPlus+ = 3 per serving
Nutritional Information: Calories: 130, Total Fat 2.5g, Saturated Fat 1g, Cholesterol 60mg, Sodium 420mg, Carbohydrates: 16g, Sugars 7g, Fiber 1g, Protein 11g
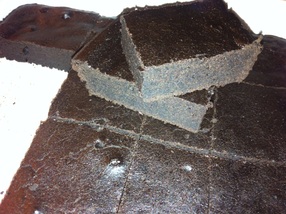
Black Bean Brownies
15oz can black beans, drained and rinsed well
3 large eggs
3 Tbsp canola oil or nonfat plain greek yogurt
½ c cocoa, unsweetened (I used Hersheys special dark cocoa)
1 tsp vanilla
½ tsp baking powder
1 pinch salt
¾ c sugar
2 Tbsp black coffee
Preheat oven to 350 degrees F. Lightly spray 8x8 pan with cooking spray. In the bowl of a food processor or a blender, process the black beans until smooth. Add the rest of the ingredients, then process again until smooth. Transfer the batter into the greased pan and smooth with a rubber spatula. Bake for 30-35 minutes, or until the edges start to pull away from the sides and it passes the toothpick test. Cool completely in the pan, then slice into squares. This is 3 WW pts each (serves 16).
These are so delicious, and no! You can't even TASTE the black beans in it. This recipe blew my mind when I tried it because it's so fudgy tasting!
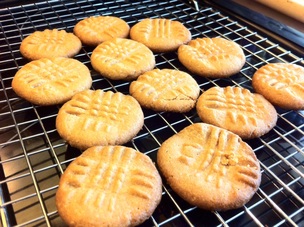
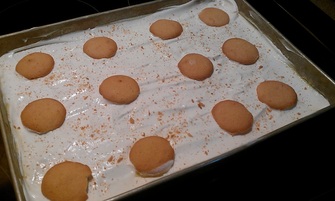
3-Ingredient Peanut Butter Cookies
1 cup peanut butter (can be crunchy or creamy, lowfat or not)
1 cup sugar (white granulated, brown, or sugar substitute-I used sugar substitute)
1 large egg
Preheat oven to 350 degrees. In a medium bowl, combine all ingredients and mix well. If you use regular sugar or brown sugar, let the dough sit for about 10 minutes before touching it (this will prevent the cookies from tasting grainy), if using a sugar substitute like I did, it's okay to start rolling out your balls. This will give you exactly 2 dozen cookies if you roll them out on the smaller side...or 1 dozen cookies if you roll them out larger than 1 inch. On a parchment lined or silicon mat lined cookie sheet, place the cookie balls a couple inches apart. Using a forks tines, make a criss cross design on top. Bake in preheated oven for 8-10 minutes. Transfer to a wire rack to cool completely before enjoying. These are only 2 Weight Watcher points each if you make two dozen, or 3 WW Pts if you made only 1 dozen from the recipe. Enjoy! And drop me a line to let me know what you thought of them! Click the title to this recipe above to take you to the video for it.
Oreo Cheesecake Truffles
36 Oreo cookies, finely crushed (or blitzed in food processor until fine crumbs)
1 pkg. (8 oz.) Cream cheese, softened
1 to 2 pkg's Wilton candy melts in your favorite colors.
Mix cream cheese and cookie crumbs until blended. Shape 48 (1-inch) balls. Melt candy melts according to package direction. Dip in melted chocolate; place on waxed paper-covered rimmed baking sheet. Refrigerate 1 hour or until firm. Drizzle any remaining chocolate over the top of each truffle to decorate. Enjoy! =)
Valentine Pretzel Buttons
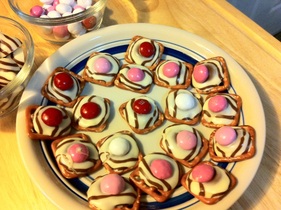
1 Package Hershey’s Valentine Kisses
1 Package Valentine’s M&M’s
1 Bag square shaped pretzels (any flavor)
Preheat oven to 200 degrees (lower to 170 if your oven runs hotter than normal). Place pretzels in a parchment or foil lined baking sheet. Place a Kiss on each one and bake for 4-5 minutes. Take out of the oven and immediately place an M&M on top of the Kiss and push down gently. This will give it that nice flattened button look. ENJOY!
Mini Apple Pies
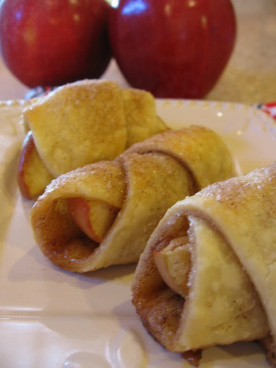
1 pkg of crescent dinner rolls (8 count)
4 Tbsp brown sugar
2 tsp cinnamon (or to your liking)
1 Fuji, Granny Smith or Pink Lady apple, cored and cut into 8ths
Preheat oven to 375 degrees. Line a baking sheet with aluminum foil or parchment paper. In a small bowl, mix brown sugar and cinnamon. Separate the crescent dough into 8 triangles. Working with the longer end, sprinkle the brown sugar mixture onto dough and place an apple slice. Roll up as if forming a crescent roll. Place on baking sheet and even space them apart. Bake for 10-12 minutes or until golden brown. Serve alone or with ice cream, whipped cream or serve as appetizers at holiday gatherings! Enjoy!
Two Ingredient Peanut Butter Fudge
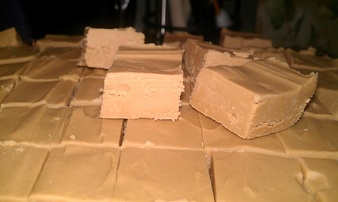
16.3 to 18 oz jar of creamy peanut butter (Depending on brand, use entire jar)
16 oz tub Vanilla frosting
Open both containers & remove liner from lid. Microwave both individually for 1 minute each and put entire contents of both in a bowl. Mix well. Line a 9x9 baking dish with aluminum foil, and pour mixture in. Smooth out with a spatula. Refrigerate until hardened and set. Cut into individual pieces and enjoy! This is the best fudge and reminds me so much of my Aunt Janet's Peanut Butter fudge she makes every year for the reunion. Only one slight difference...mine is only two ingredients and hers isn't! ;)
Pumpkin Pie Dip
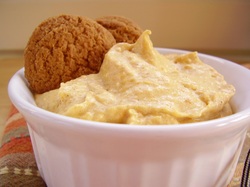
You'll Need:
1 cup pure pumpkin (not pumpkin pie mix)
1/2 cup sour cream
2 cups powdered sugar
8 oz cream cheese, softened at room temperature
1 teaspoon cinnamon
1 & 1/2 teaspoons pumpkin pie spice
1/2 teaspoon ground ginger
Mix together sugar and cream cheese until smooth. Beat in rest of ingredients until well blended. Serve with gingersnap cookies, graham crackers or fruit of your choice. Refrigerate leftovers. Makes about 4 cups.
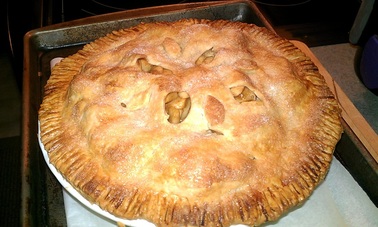
Apple Pie
Ingredients:
Refrigerated (2 per roll) rolled pie crust or homemade pie crust (enough for double crust)
1/2 C. plus 1 teaspoon granulated sugar
1/2 C.light brown sugar
3 Tbsp Cornstarch
1/2 tsp cinnamon
1/4 tsp salt
Pinch of ground cloves
1 tsp apple or pumpkin pie spice
2 lbs Granny Smith and 2 lbs Fuji applies, peeled and cored
2 Tbsp unsalted butter
3 Tbsp lemon juice
1 large egg, beaten with 1 Tbsp water
Heat oven to 400 degrees. Unroll one piecrust (if using homemade pie crust, take one pie crust) and roll out slightly with a rolling pin to 12 inches. Place in the bottom of a deep dish pie crust. Prick bottom of crust with a fork and refrigerate while putting together rest of the ingredients. In a small bowl, blend all the dry ingredients and put aside. Cut apples into 1/2 inch pieces. Melt the butter in a large pan and add apples, lemon juice and dry ingredients. Cook 7-10 minutes, stirring occassionally until juices thicken. Cool for 25 minutes the place apples and juices in pie crust. Unroll second pie crust and roll out to 12 inches. Cut vent holes in the center of the dough. Place the dough on the top of the apples in pie plate and center it over the filling. Crimp edges together either with a fork or by pinching the edges with your fingers, making sure to seal all edges very well. Brush top of pie with egg mixture and sprinkle the remaing teaspoon of sugar over the top. If you are afraid your pie will spill over in your oven, you can place the entire thing on a parchment or foil lined baking sheet before placing in oven. Bake at 400 degrees for 15 minutes, then reduce temperature to 350 degrees and bake another 25 minutes. If your pie crust gets too brown, place aluminum foil over the top to stop browning. Cool about 45 minutes to an hour before serving with ice cream, whipped cream or alone. Enjoy!
Banana Pudding Squares
Ingredients:
70 Nilla Wafers, crushed
1 stick of unsalted butter or margarine, melted
1/2 C. Powdered Sugar
8 oz, Cream Cheese, softened
3 Bananas, sliced
2 pkg Instant Vanilla Pudding (4 oz. boxes)
3 C. Milk
Cool Whip (8 oz. container, and thawed in the refrigerator)
In a medium bowl, mix together the crushed wafers and melted butter. Press evenly on the bottom of a 13x9 pan and place in fridge while you get other ingredients together. In a medium bowl, mix together the cream cheese and sugar, then stir in 1 & 1/2 cups of the whipped topping. Spread over the top of the crushed wafers, then place the sliced bananas on top of the cream cheese mixture. In a large bowl, mix both packages of the pudding and milk together with a whisk for 2 minutes. Spread over the top of the bananas. Place remaining whipped topping over the top of the pudding layer and spread evenly. Decorate with shaved chocolate or any remaining Nilla Wafers. Refrigerate for at least 3 hours before serving. Cut into squares and enjoy!
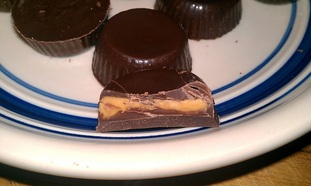
Chocolate Peanut Butter Cups (Click the name to see my video on this)
Ingredients:
1 & 1/2 Tbsp. Unsalted butter (at room temperature)
1/2 C. Smooth peanut butter (you can use chunky if you like)
3/4 C. Confectioner sugar, sifted (powdered sugar)
1 Pkg. Dark chocolate candy melting wafers
Candy molds for the peanut butter cups (you can find them at any craft store)
Decorating brush for candy molds
To Make:
Cut butter in small pieces and put in small saucepan over low heat. Add peanut butter and stir until melted. Remove from heat. Stir in confectioners' sugar, blending well. Add more confectioners' sugar, as necessary, to form a pliable mass. Wrap in plastic and refrigerate for about an hour. In the meantime, melt chocolate candy wafers according to package directions. Put a little of the chocolate in the bottom of the molds and tap the mold on a flat surface to settle the melted chocolate to the bottom of the molds. With a decorating brush, paint some of the chocolate up the sides of each mold. When complete, place in refrigerator to harden. When the peanut butter dough is ready, take both the peanut butter dough and the mold out of the fridge. Pinch a little of the dough off and roll into a little ball. Place a small ball into each mold, and with your finger, tap it down to flatten inside of each mold. When done, squirt some more melted chocolate onto each one and tap the mold lightly to cover completely over the peanut butter. Place back in fridge to chill and harden completely. When ready, pop out of molds and enjoy! This will make a lot! Keep them in the refrigerator. They will keep this way up to two weeks, or until all gone! ENJOY!
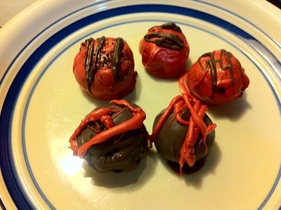
Red Velvet Truffles!

Ingredients:
13 x 9 Red Velvet Cake, cooled
16 oz. Cream Cheese Frosting
Candy Melting Wafers (for coating and decorating)
Crumble Red Velvet cake into large bowl and mix in 1/2 to 3/4 of the frosting with spoon. Then, with clean hands, mix cake and frosting by hand until mixture is consistency of a loose Play Doh. Form into balls using a cookie scoop or teaspoons and place onto wax paper lined baking sheets. Freeze the balls for 45 minutes, or refrigerate for 2-3 hours, or until completely chilled and cold. Take balls out of the freezer/fridge and set aside while you melt your candy making wafers in bowls according to package directions. Dip each ball into the melted wafers to coat and place back onto the wax paper lined baking sheets to harden. Take remaining melted candy wafers and place into ziplock back and close, removing all the air from the bag as you close it. Snip a small corner of the bag and design the Red Velvet Truffles into whatever design you choose. These are great for Valetine's Day or any time you want to impress family, friends or a significant other. Enjoy! And please feel free to comment to me on my home page. I'd love to hear from you!
